I spent a lot of time researching the pros and cons of having a hosted vs a self-hosted blog.
However, if you’re on a tight budget forking over $100s of dollars for 3 years of hosting through Siteground or Bluehost doesn’t make sense.
Especially, if your blogging as a hobby or just testing the waters.
Price was one of the top reasons why I started my first blog on wordpress.com instead of self-hosted WordPress.
It’s also one of the many reasons I left wordpress.com and transferred my blog to self-hosted WordPress.
Why I Chose Nodehost
1.Price
One of the biggest reason I chose to sign-up with node host was the price.
Where else can you self-host a blog for less than $22/year? !
I currently have 3 blogs hosted through Nodehost and I only pay $85 a year for all 3 of them.
I was paying $96/year for each blog on wordpress.com on their premium plan.
Plus, I got to test out their platform for free for 30 days.
2. Customer Service
Nodehost has excellent customer service.
Anytime I’ve had a problem I’ve been able to contact the help desk and get answers.
Sometimes they would go in and fix the problem for me.
The best way to contact them is either through twitter or the slack community.
If you use the chat feature it takes them awhile to get back to you.
3. Extra Features
No yearly or monthly rate lock in.
No dramatic rate increases after the promotional period ends.
Free SSL certificate.
Automatic daily site backups.
99.9 % uptime guarantee or you get credit back.
What more could a girl ask for?
How To Set-Up a Self-Hosted Blog on Nodehost

Step 1: Sign Up for Node Host (if you use my affiliate link you’ll get a 30 days of free hosting.)
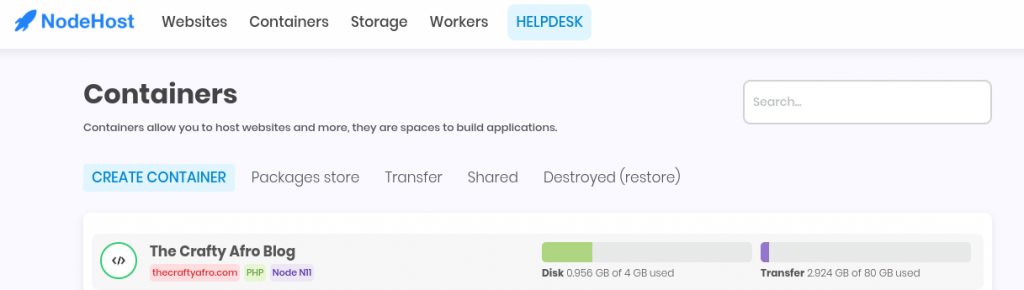
Step 2: Click on Containers

Step 3: Click on Create Container
Step 4: Click on Container type—> Standard Container

Step 5: Chose a location (pick the server that is closest to you)
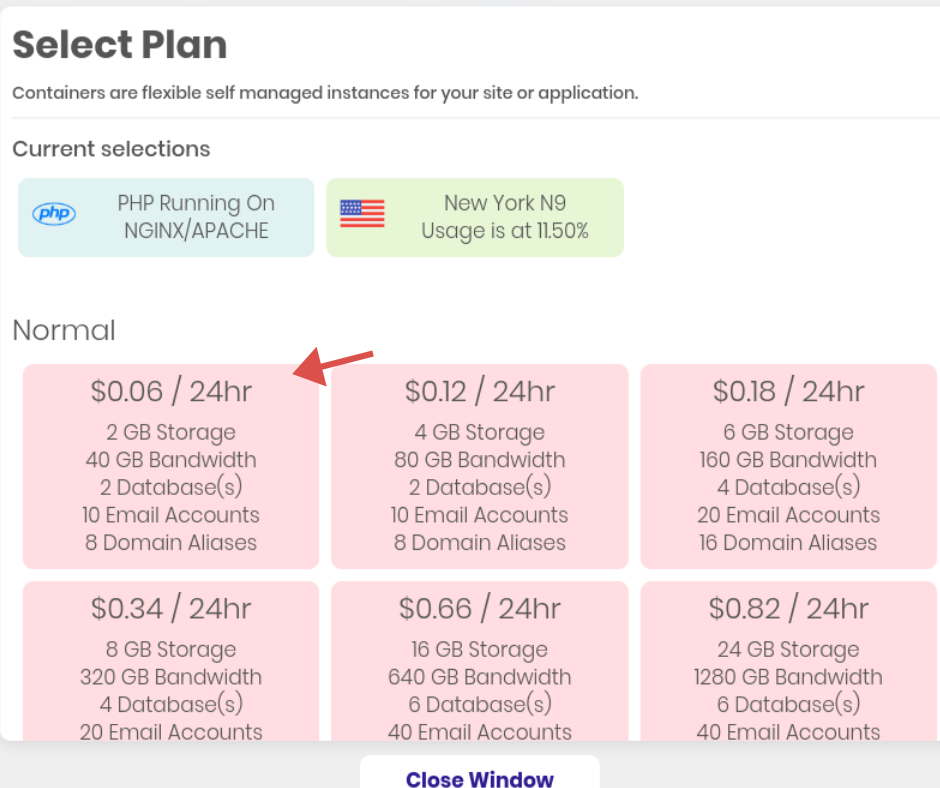
Step 6: Choose a plan (if you are starting a brand new blog start with the normal 0.06/24hr plan.)
You can resize your container with a single click of the resize/upgrade button. I transferred my first blog to Nodehost using the $3.60/ month plan and it’s more than I needed.
Step 7: Set-up Your Container

This will take you to your Nodehost dashboard, where you will see your new container.
Your container will have a unique name like the one in the image below.
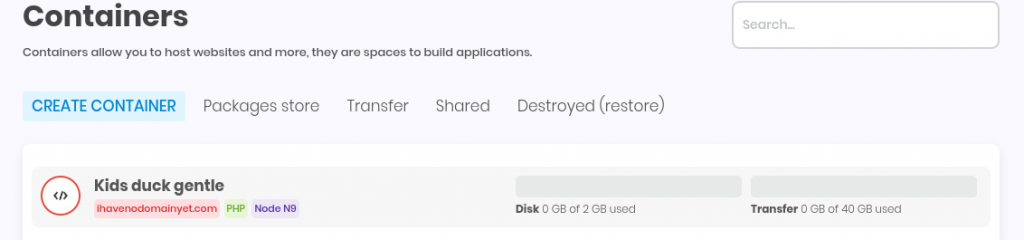
Don’t worry you can rename your container on the next screen.
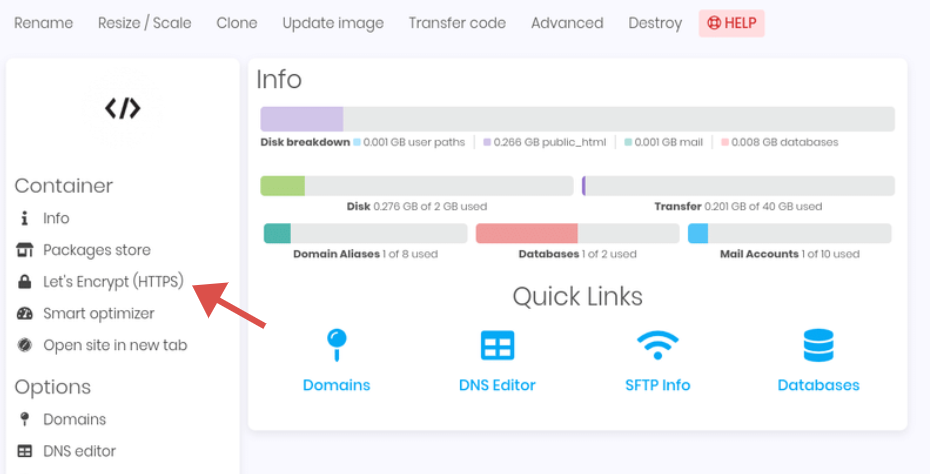
Step 8: Click on your container. It should take you to your containers dashboard
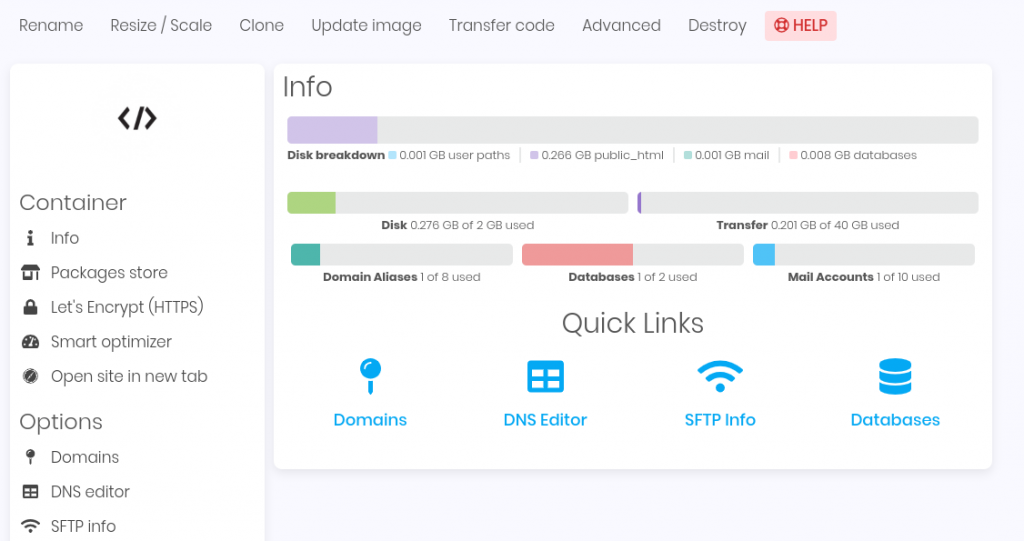
The container dashboard will give you a quick overview of what actions you have taken and access to your domains, DNS editor,SFTP info and databases.
Step 9: Set-Up Your Domain
Click on domains on the left hand side.
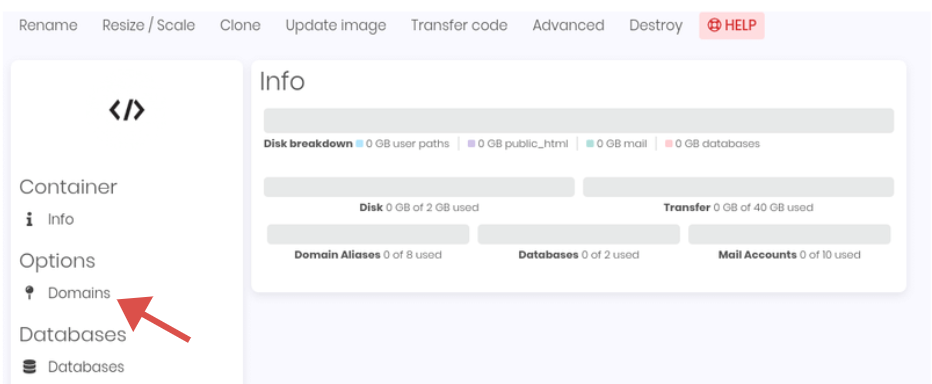
Click create domain.
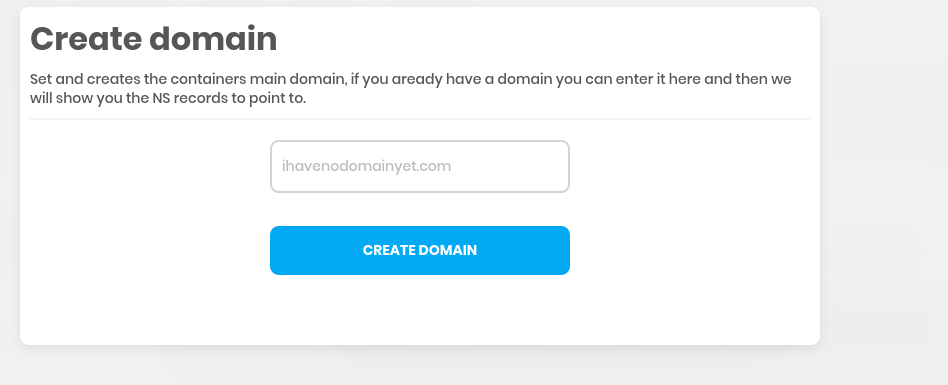
On the next screen type your domain name (i.e jesusinthecenter.com)
*sidenote* Nodehost will give you a free domain name. DO NOT use this name to set-up your blog.
Click create domain.
Your domain name will show up in the domains section.
Step 10: Update your domain name servers.
Now that your domain is activated in Nodehost you will need to point your domain to the Nodehost nameservers.
If your domain is hosted through Namecheap you can find the directions here. (option 2)
If not you will have to login to your domain registrar to learn how to change your nameservers.
You will need the nameservers to be pointed at your domain before you can set-up your blog or activate your SSL certificate.
It can take a few minutes -48 hours for the change to show up in the system if you are transferring your blog.
You can check this by looking at the checklist on your dashboard container.

Step 11: Activate Your SSL certificate
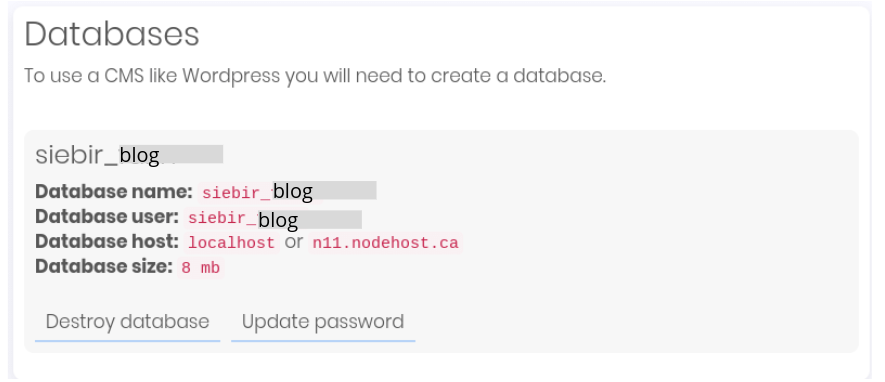
Step 12: Set-Up Your Database (you only need to set-up one for now)
Click on database–> create database (top left)
On the next screen create a username and password for your database. This is where all the data for your blog will be stored.
*sidenote* Do not change your password or else your site will not run correctly.
You will need the information in the section to setup your blog on WordPress.
Step 13: Install WordPress
Click on Package Store –> WordPress —> Install
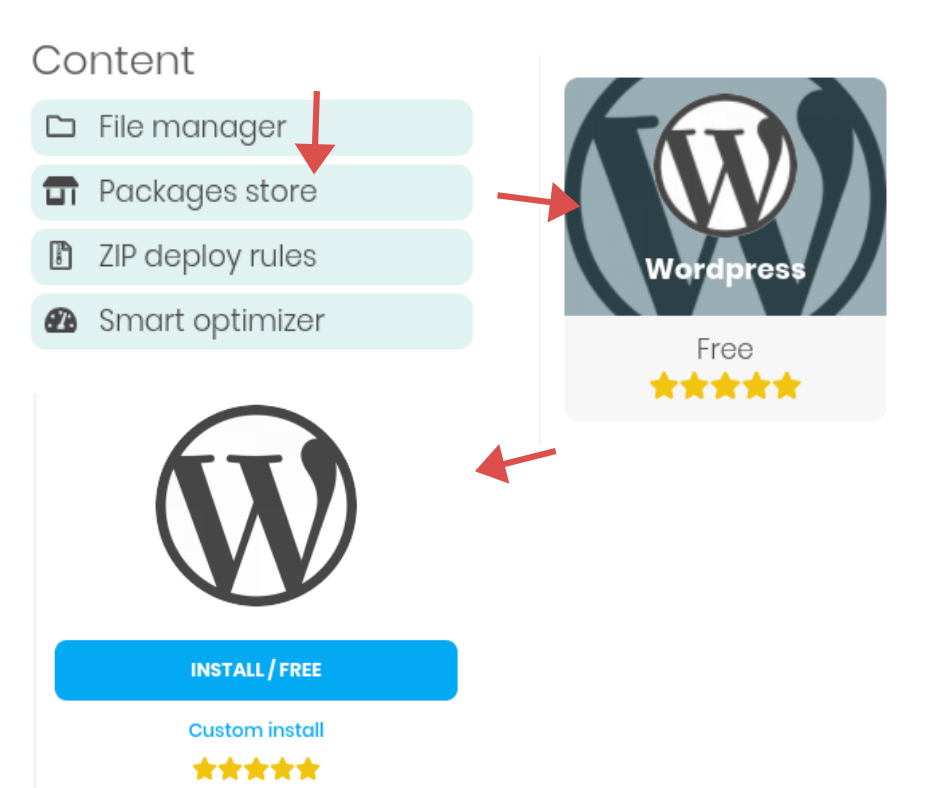
Once you click on install you will be taken back to the dashboard. Once the package has installed WordPress a set-up screen should open in a new tab.
If it doesn’t then type the following in a new tab https://yoursitename/wp-admin/setup-config.php
Step 14: Follow the directions on the screen (don’t forget to have your database information on hand).
Once you are finished you’ll be taken to the WordPress dashboard.
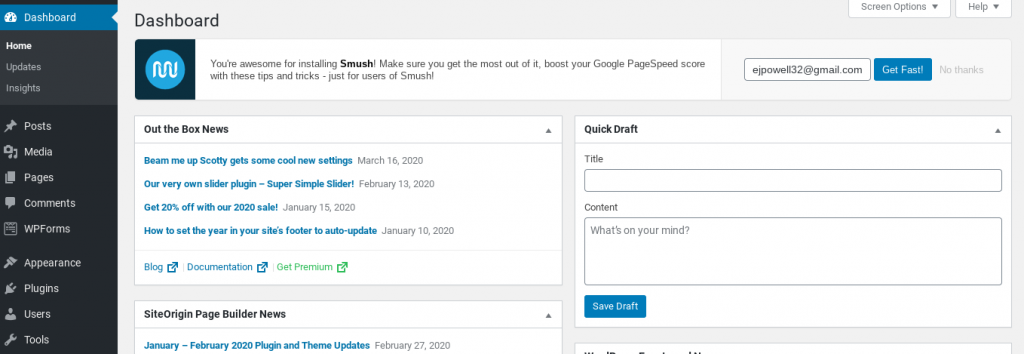
Congratulations! You officially have a self-hosted WordPress website!
Make sure you bookmark the WordPress login screen,that way you can easily login to work on your site.
Now, all you have to do is set-up your blog and start writing!
If you’re still not sure if you should self-host your blog or use a free platform don’t forget to read my post on 6 reasons you should not self-host your blog.
Don’t forget to pin this post for later!
Your Sister in Christ,
Eboni
This seems so much simpler than I thought!! Thanks for the simple steps! Great post!
Hi Ashley! Thanks for commenting! Yes, I thought it would be really hard to go self-hosted, but it was easier to set-up than I thought.
Hi Ej. Love the step by step break down and links provided.
❤ I’m also happy you are enjoying Nodehost.
Hugs
Hi Ifeoma! Thanks for commenting! Yes! I really like them as a hosting company. It’s been so easy to get my blog set-up with them.
Thank you for making it so easy for someone to start their own blog. Right now is the perfect time to share our faith online.
Hi Susan! Yes, now is a great time to start a blog and spread more Jesus on the internet! Thanks for commenting.
Thanks for sharing this very insightful post. I found it very helpful
Hi Hannah! I’m glad you found this post helpful. Let me know if you have any questions and thanks for commenting!
Such a helpful step by step – I’m self-hosted and have been from the beginning but I knew what I was doing so that made it easier! This is going to be so valuable to new bloggers or anyone making the change from wordpress.com to self hosted 🙂
Hi Lisa! Thanks for commenting. I have enjoyed having a hosted blog,but I am really like the freedom that comes with being self-hosted.